FDSA User Interface Tutorial
The FDSA User Interface is where administrators configure security, manage users and data, and oversee data access requests. This tutorial walks you through your first login and the key areas of the admin dashboard so you can confidently manage your FDSA environment.
1. Get Started as an Administrator
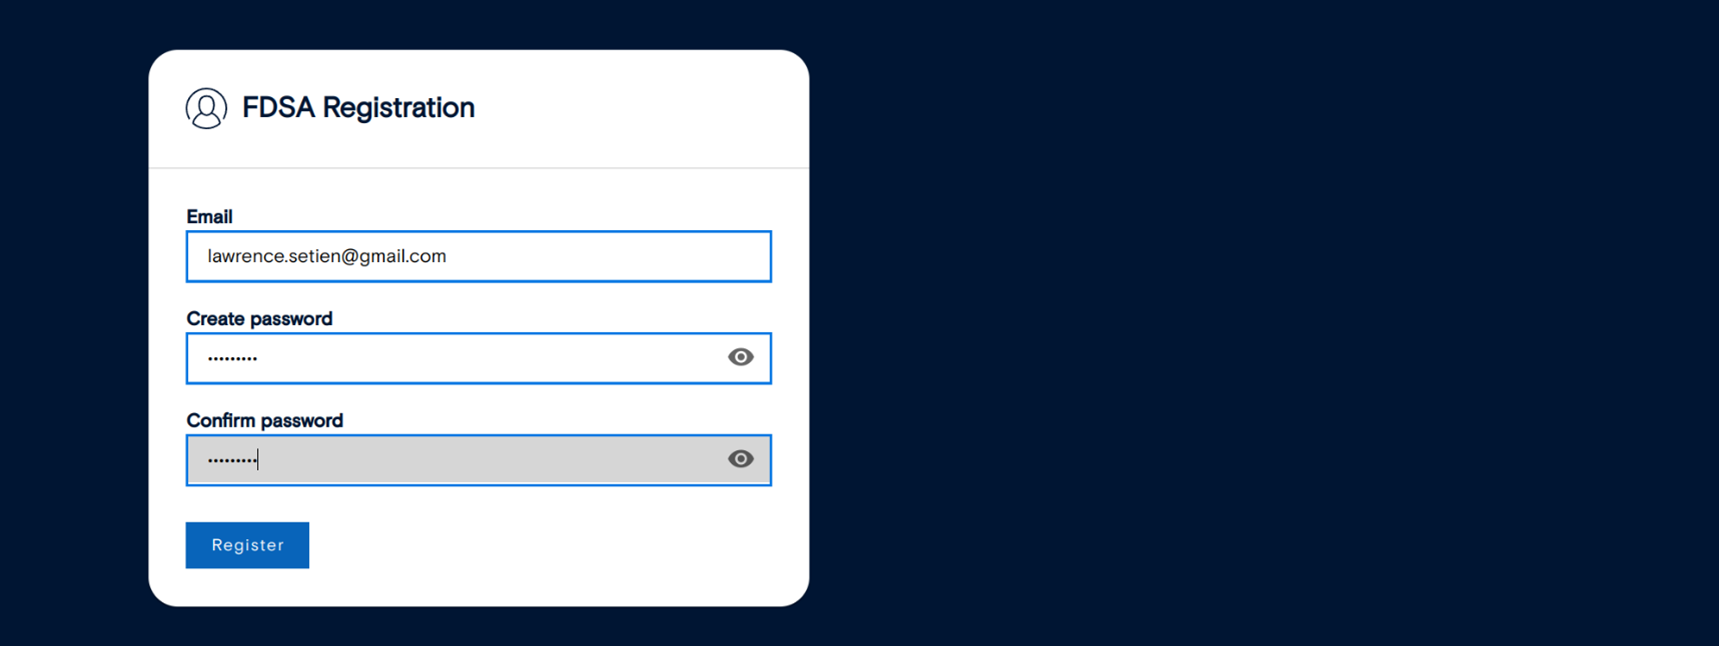
1.1 Create your first administrator account
To begin, open your browser and go to This is where you’ll create your first administrator account, which will have full access to manage and configure FDSA, after your successful installation. Enter the required information to complete the setup. Once the administrator account is created, you can proceed to sign in and configure additional security settings.
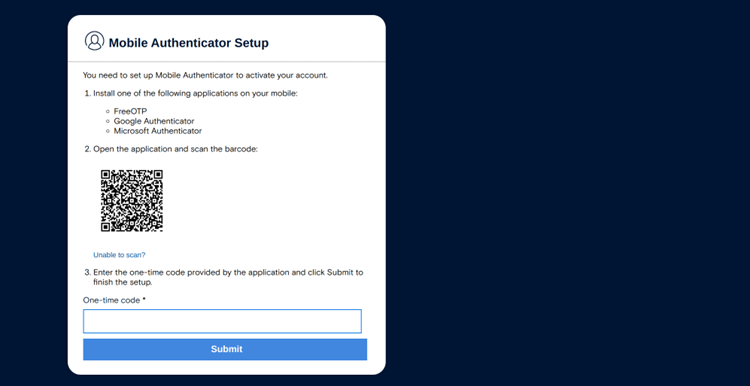
1.2 Set up Multi-Factor Authentication (MFA)
After creating your administrator account, sign in using your credentials. You’ll then be prompted to connect a Multi-Factor Authentication (MFA) app, such as Google Authenticator or Authy, to add an extra layer of security. Scan the QR code on your screen using the app and enter the verification code it generates to complete the setup.
If you have trouble setting up MFA, especially if the code keeps failing, make sure that the time on your phone and the server are synchronized — a mismatch in time is a common cause of this issue.
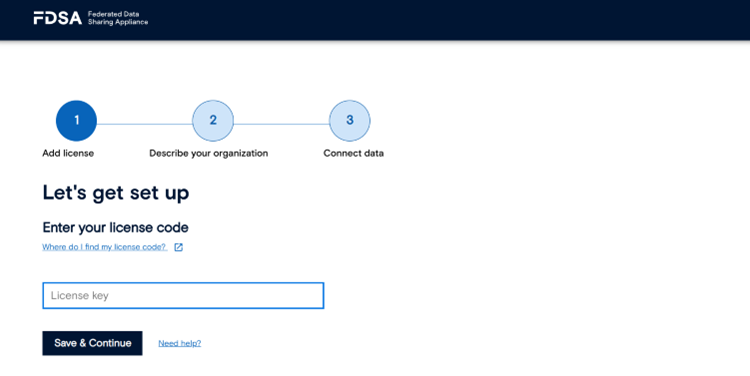
1.3 Complete your first login
Once you complete MFA, the system will walk you through a few short setup steps to finish configuring your account. Follow the on-screen instructions to finalize your first login and access the administrator dashboard.

2. Navigate the FDSA Admin Dashboard
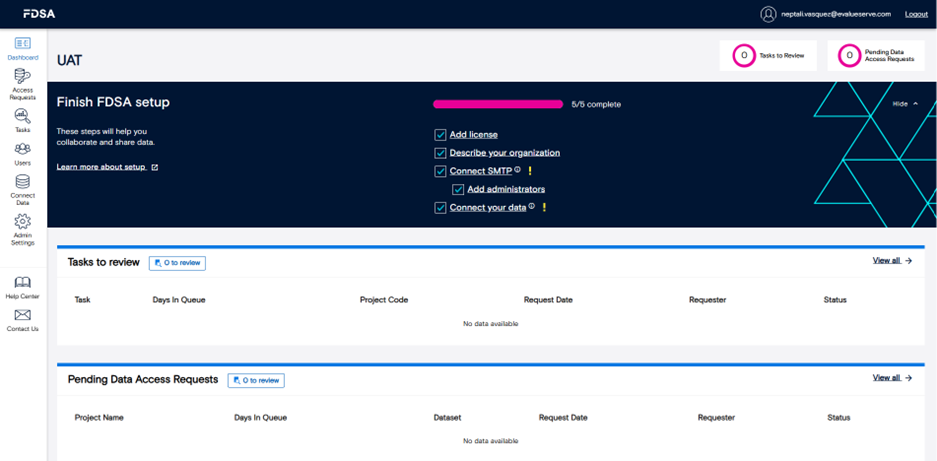
2.1 Overview landing page
After logging in, you’ll land on the Overview page. This section gives administrators a quick snapshot of the FDSA environment, including the status of pending Data Access Requests (DARs) and tasks awaiting review. It’s designed to provide at-a-glance visibility into system activity so you can prioritize what needs attention right away.
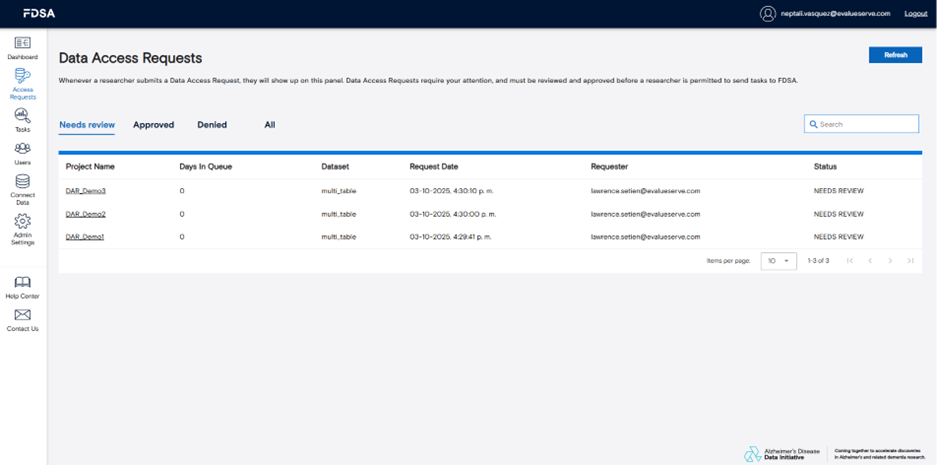
2.2 Data Access Requests (DARs)
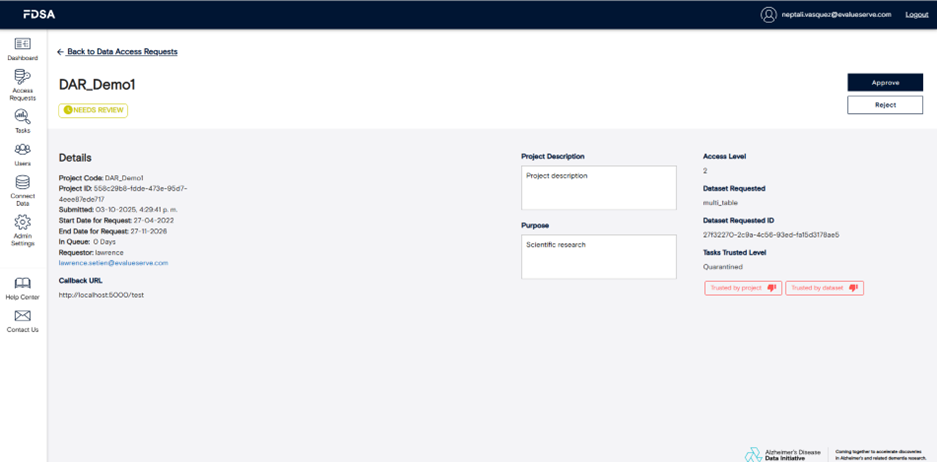
In the Data Access Requests section, you’ll find detailed information about all submitted DARs from researchers. Each entry includes key details such as requester information, datasets requested, and approval status. To view a specific request, click on its name to open the detailed view, where you can either approve or reject the DAR.
There are two trust mechanisms that simplify future reviews. Trusting by dataset means that all future tasks under that dataset are automatically marked as complete without needing manual approval. Trusting by project code means that any task created under that project will also bypass review and move directly to completion.
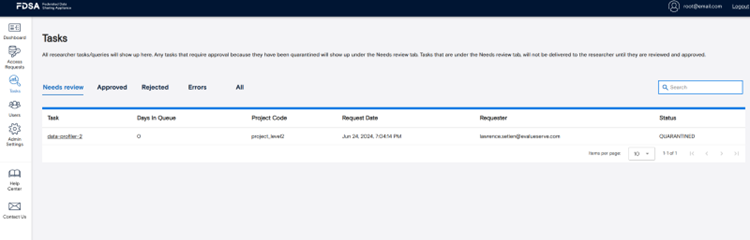
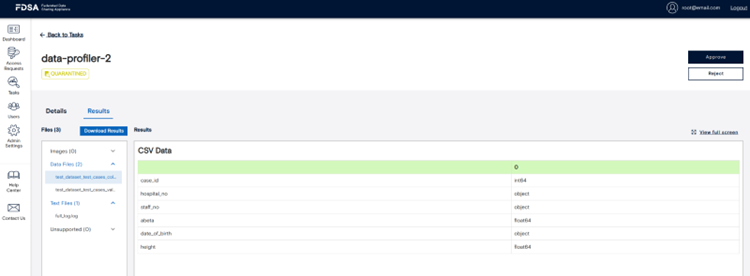
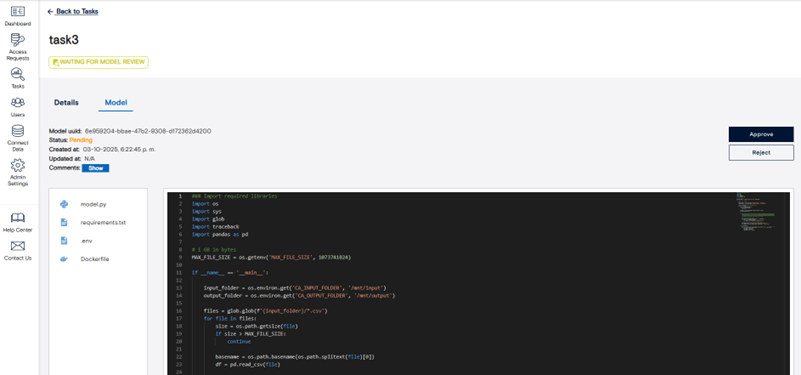
2.3 Remote Query Tasks
In the tasks section, remote queries that have been associated with the respective FDSA instance are grouped by status and listed. Clicking a task name opens its detailed view, where you can examine metadata, submission parameters, and results. You can view processed output under the “Results” tab. If model review is enabled for the dataset, a third tab titled “Model” will appear, allowing you to inspect the code used in the task before or during quarantine review. This helps maintain transparency and control over models executed within the system.
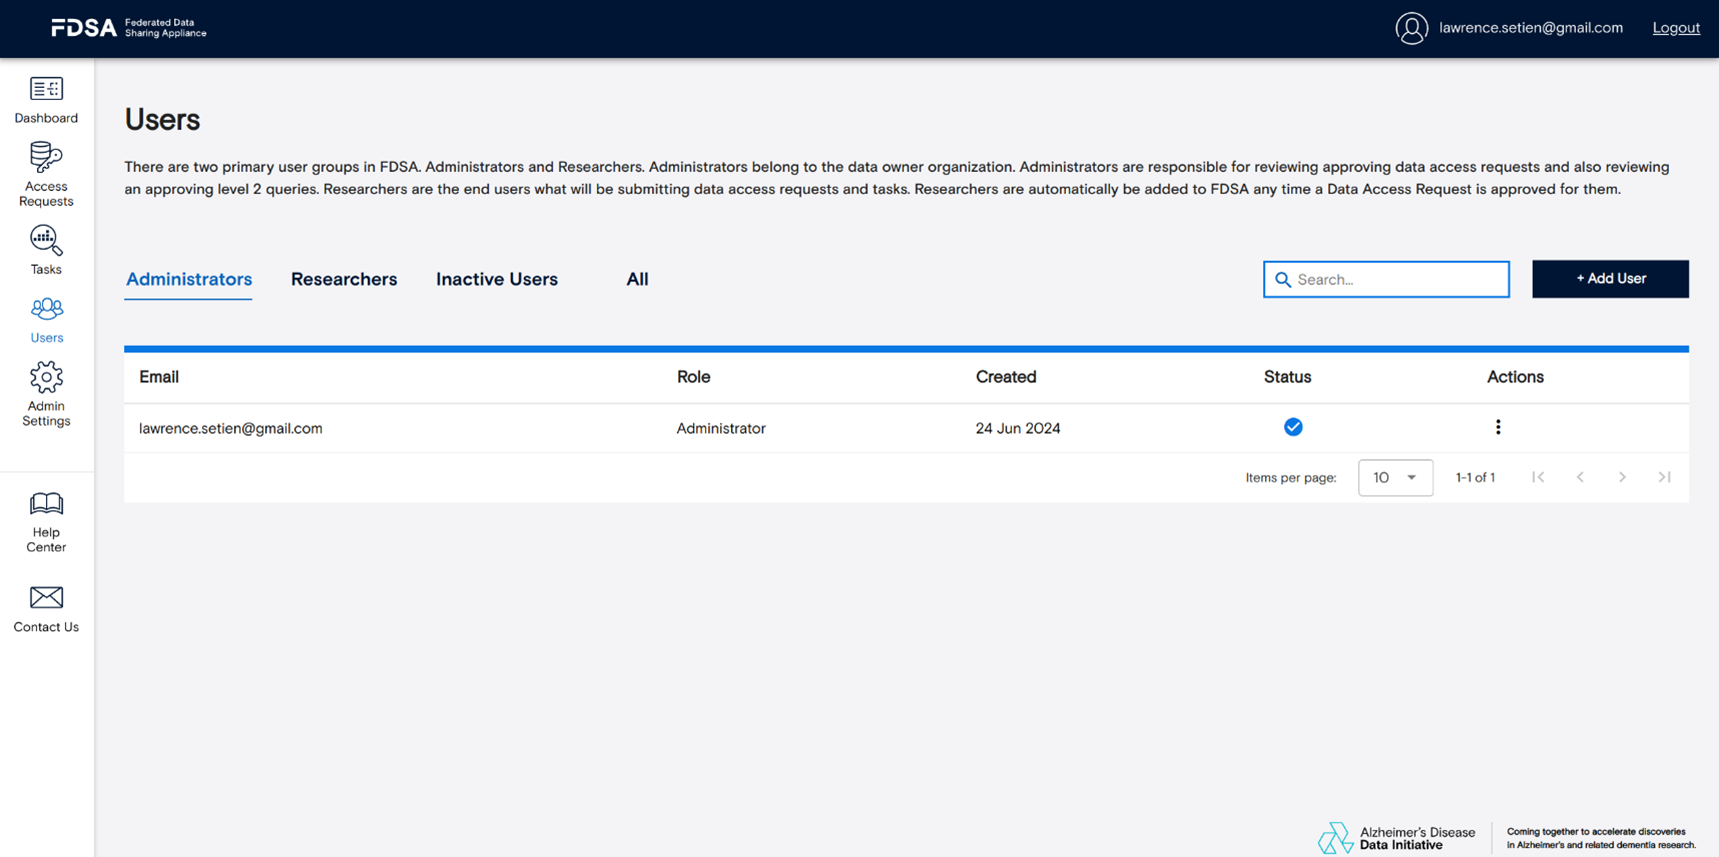
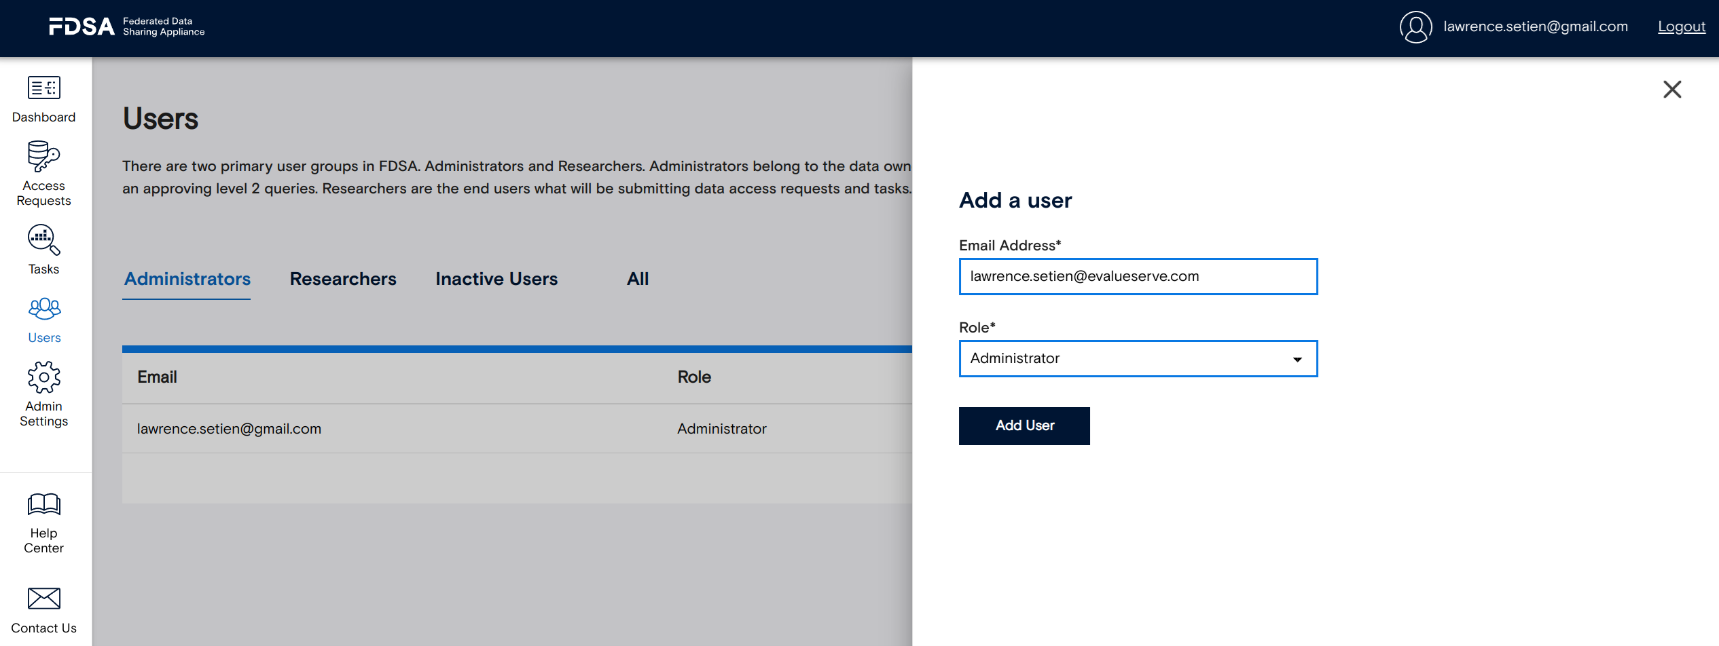
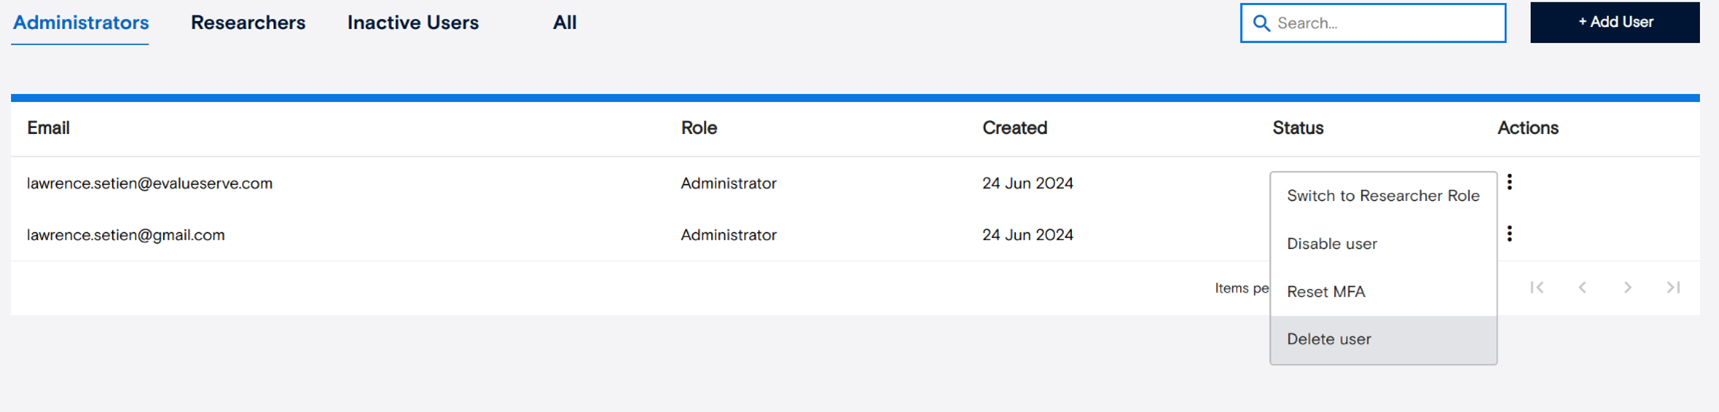
2.4 Users
The Users section is where you can manage who has access to your FDSA environment. To add a new user, open the Users tab and click “Add User.” Enter their email address and assign the appropriate role before confirming. The system will automatically send an email with temporary login credentials to the new user. When they log in for the first time, they’ll be required to set up MFA and create a new password.
Administrators can manage users under the “Actions” menu, where they can change roles, reset MFA, or disable or delete accounts as needed. This section ensures that only authorized users have access and that user roles remain current and secure.
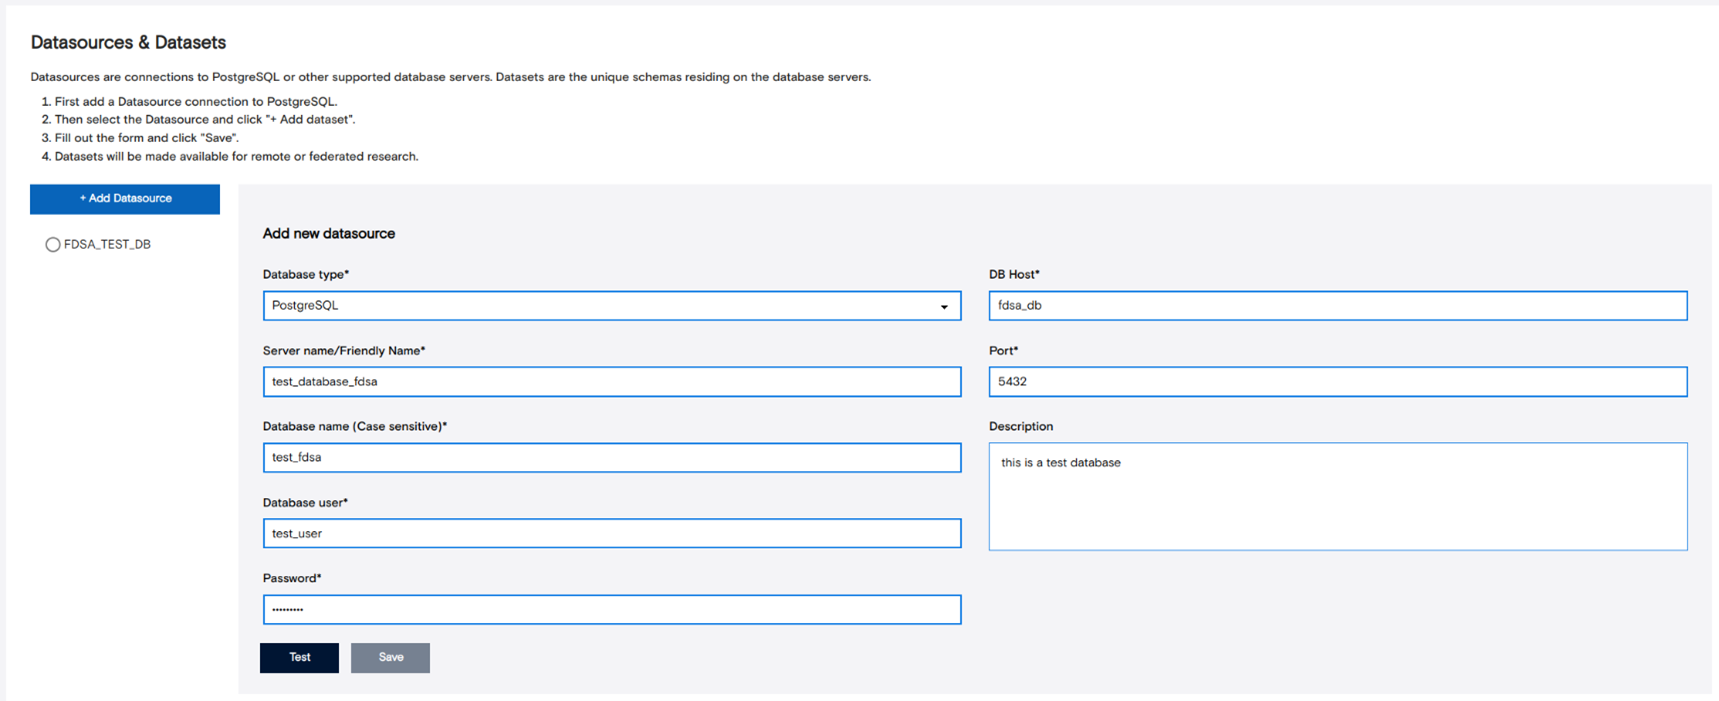
3. Connect Data Sources and Datasets
FDSA includes a default test data source named FDSA_TEST_DB. Before adding new data sources, review the setup instructions for creating a datasource database. Once ready, add your new datasource in FDSA and select it from the list. You can then add datasets to it by clicking “Add Dataset.” The system will guide you through generating a Fair Data Steward Token, which links the dataset securely to your instance. After completing the form, click “Save” to finish.
From this section, you can also update or remove datasources and datasets as needed. If you’d like to review the model code before execution, enable the “Require model review” option in the dataset’s settings. This allows you to verify model scripts before approval or during the quarantine process.

4. Configure System Settings
The Settings section controls core behaviors such as email, organization details, registries, licensing, tokens, and IP whitelists.
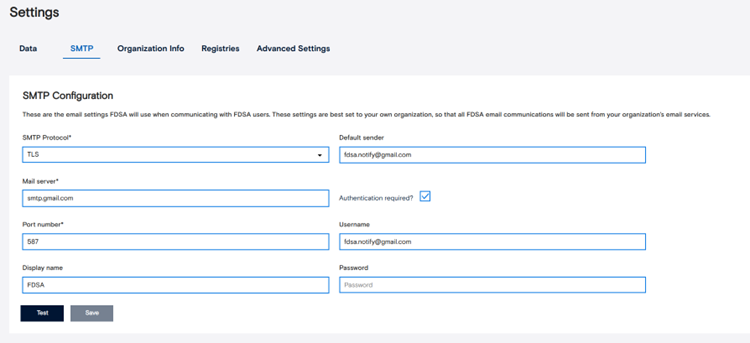
4.1 Email (SMTP) – notifications, password resets.
The SMTP tab lets you test and update your outgoing email settings. Proper configuration ensures that system notifications, alerts, and password reset messages are sent reliably to users.
4.2 Organization info – what researchers see as the “owner” of this FDSA instance.
This tab stores details about your organization, such as name, contact information, and other identifying details that researchers will see. Keeping this information up to date helps users easily recognize your FDSA instance.

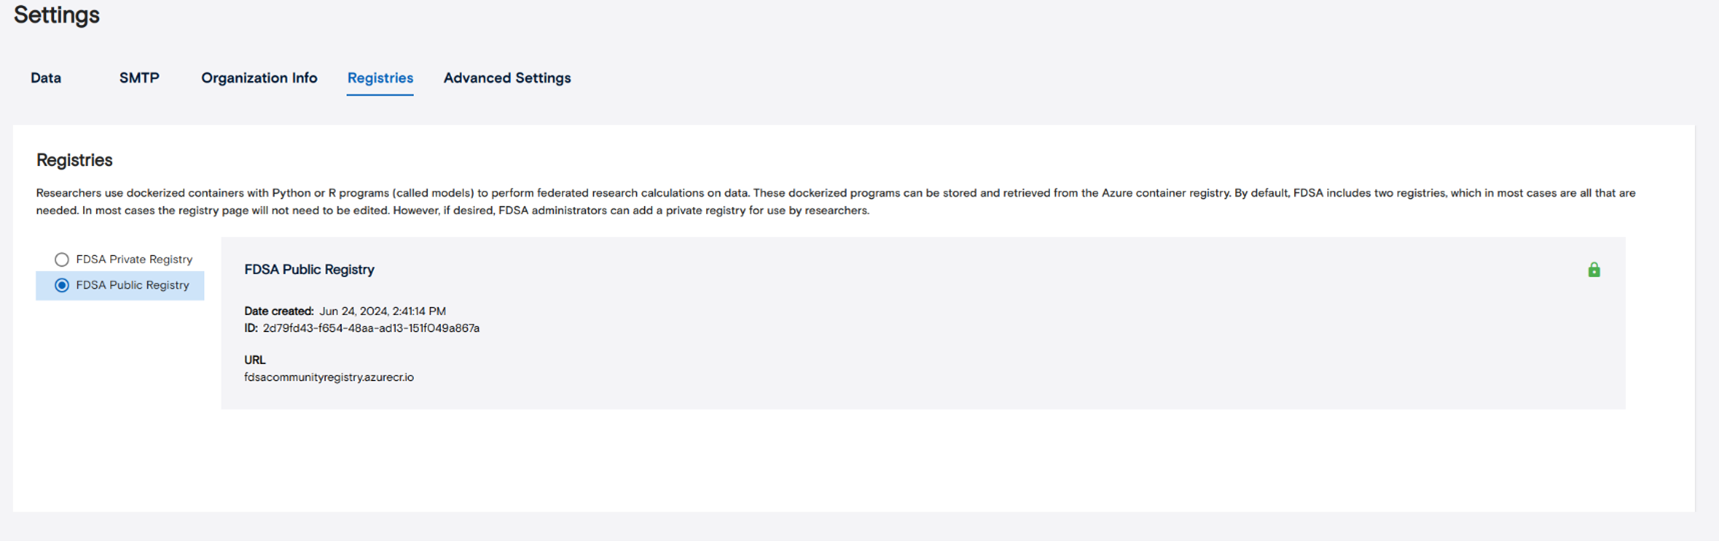
4.3 Model registries – public + private by default; add/remove others.
In this view, you can see all model registries that researchers can access. By default, the installation includes two registries — a public registry and a private registry. You can add or remove additional registries based on your organization’s needs.
4.4 Advanced settings
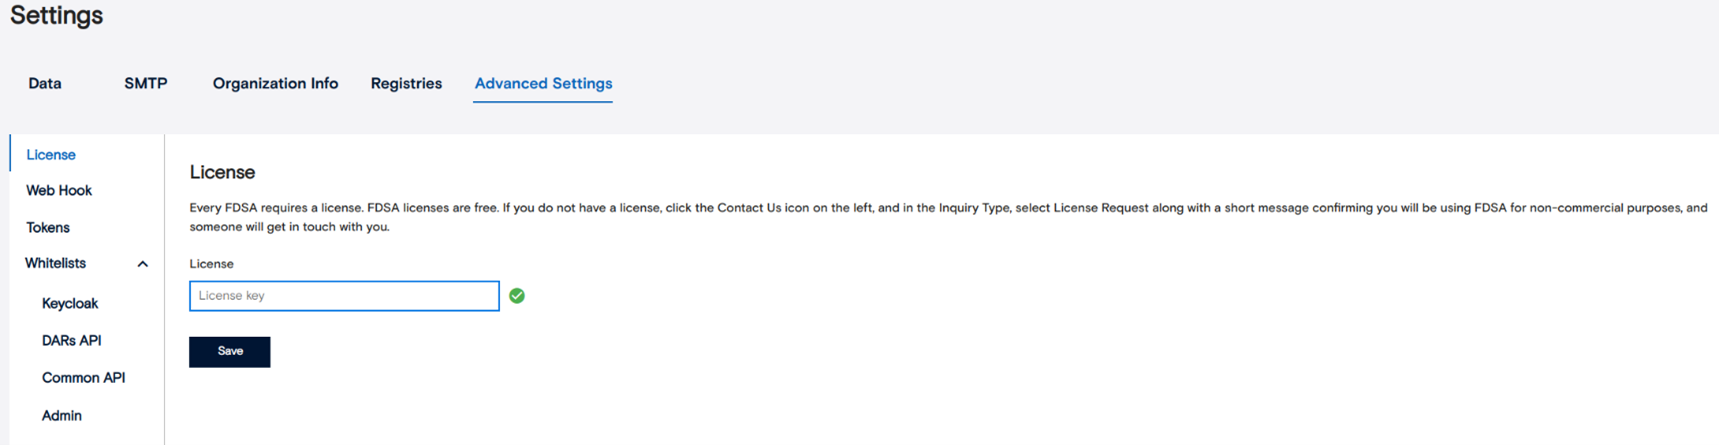
License – upload/renew license file.
If your license expires or needs to be updated, you can upload a new license file here. This ensures uninterrupted access to all FDSA features and services.
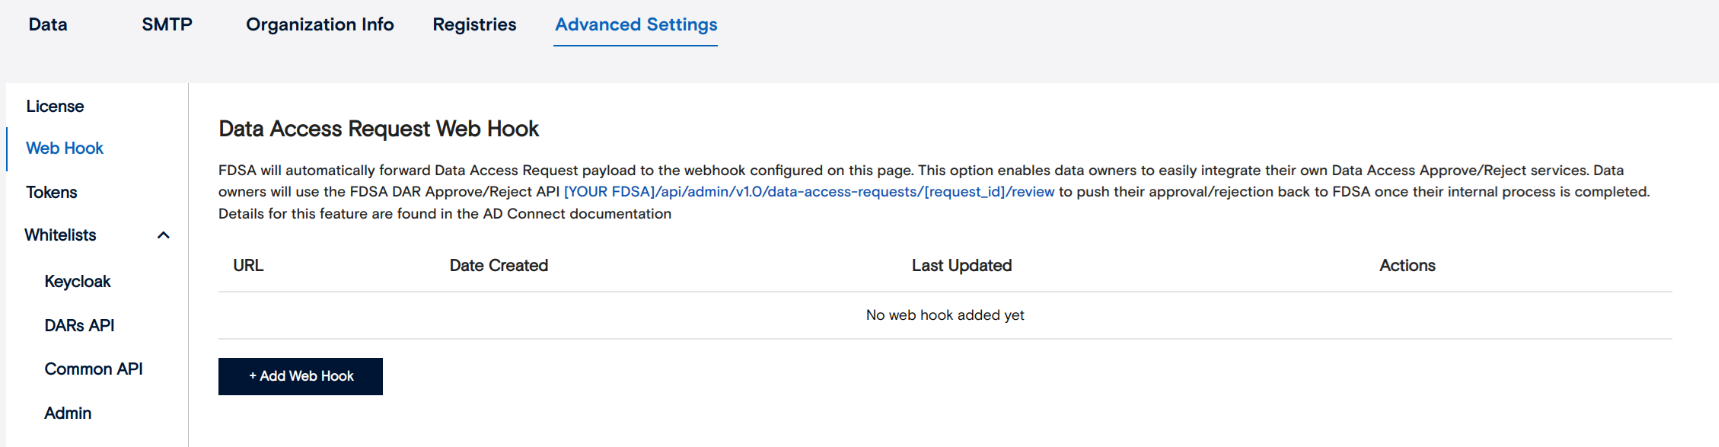
Webhooks – automated notifications around DARs.
This section allows you to configure webhooks for automatic updates and notifications related to Data Access Requests. Webhooks can help streamline communication between systems and reduce manual follow-up.
Tokens – session duration and auto-logout behavior.
Here you can define how long session tokens remain valid before users are automatically logged out. Adjusting token duration helps balance convenience with security, depending on your organization’s policy.

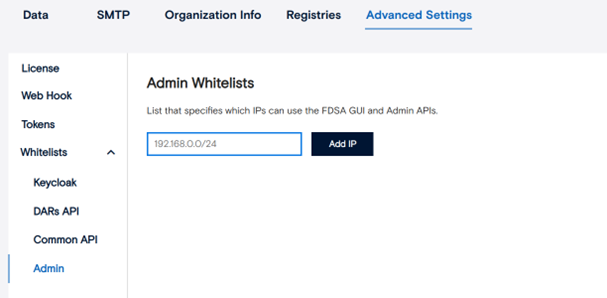
Whitelists – which IPs are allowed; note that misconfiguring can lock people out.
The Whitelist section allows administrators to control which IP addresses are permitted to access different parts of FDSA. By default, all IPs are allowed. However, once you add specific IPs, only those addresses will have access. Use this feature carefully — entering the wrong IPs can block valid users from connecting to the system.
5. Get Help and Support
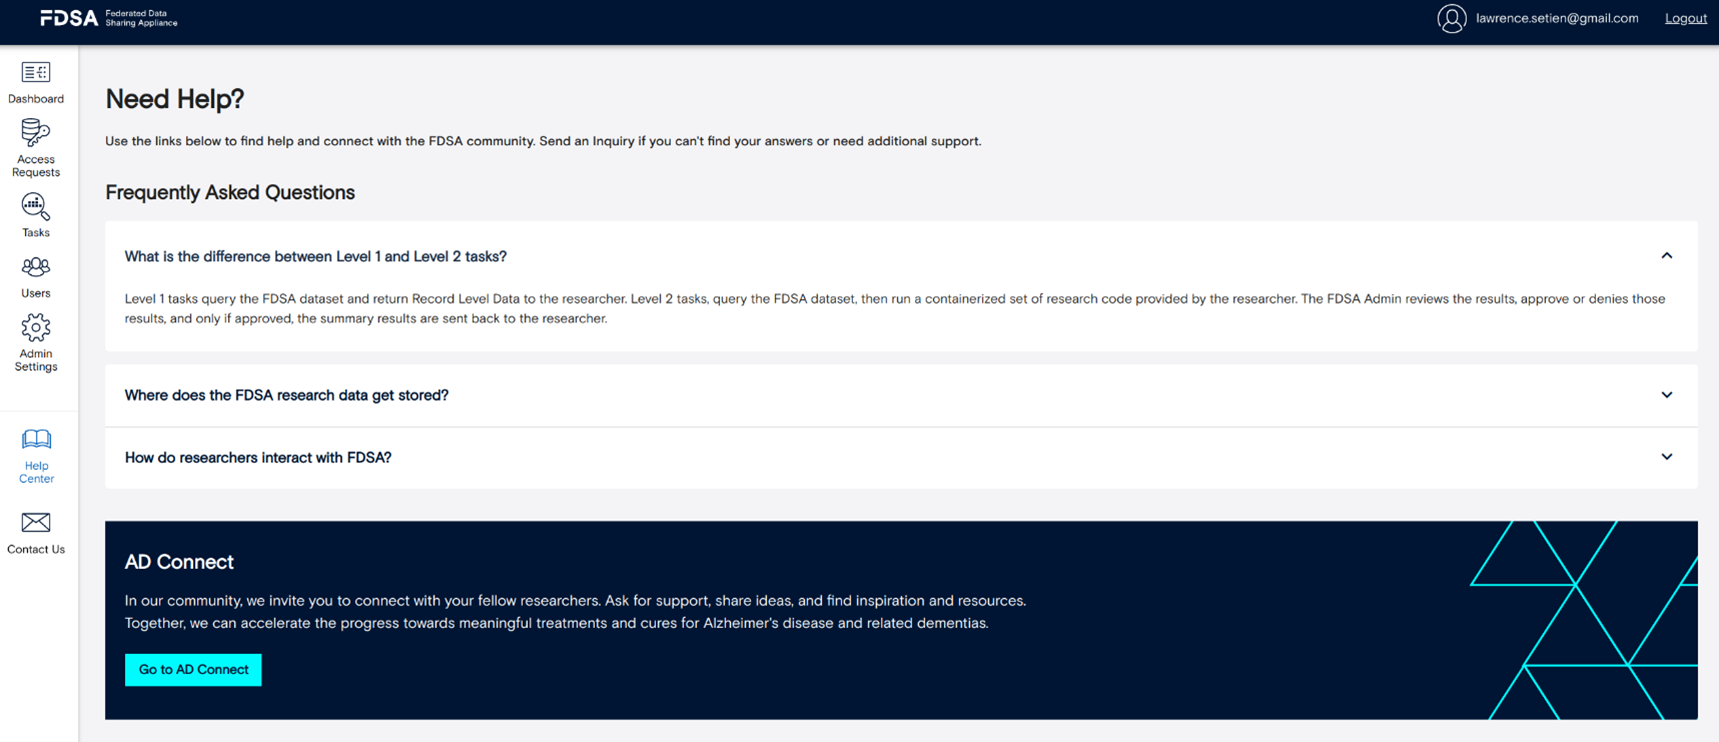
5.1 Help Center – self-service guides, FAQs, troubleshooting.
If you need guidance or run into issues, the Help Center offers step-by-step instructions, FAQs, and troubleshooting articles. It’s the best place to find immediate answers before reaching out for support.
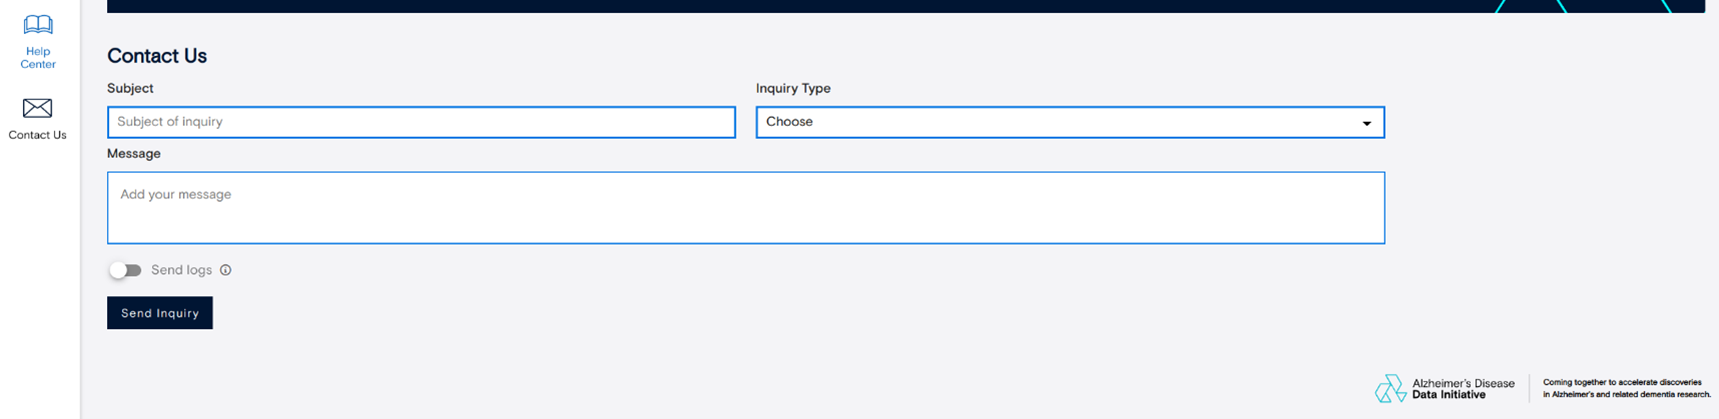
5.2 Contact support – when to escalate, what info/logs to include.
If you encounter a problem that you can’t resolve through the Help Center, visit the Contact Us section. Here you can send an email or message to the support team describing your issue. Include as much detail as possible so they can assist you quickly and effectively. There is an option to send logs as well.